In my very first post here I expressed our frustration on realizing the enormity of the task ahead, and simultaneously feeling an inability at the time to make any real forward progress.
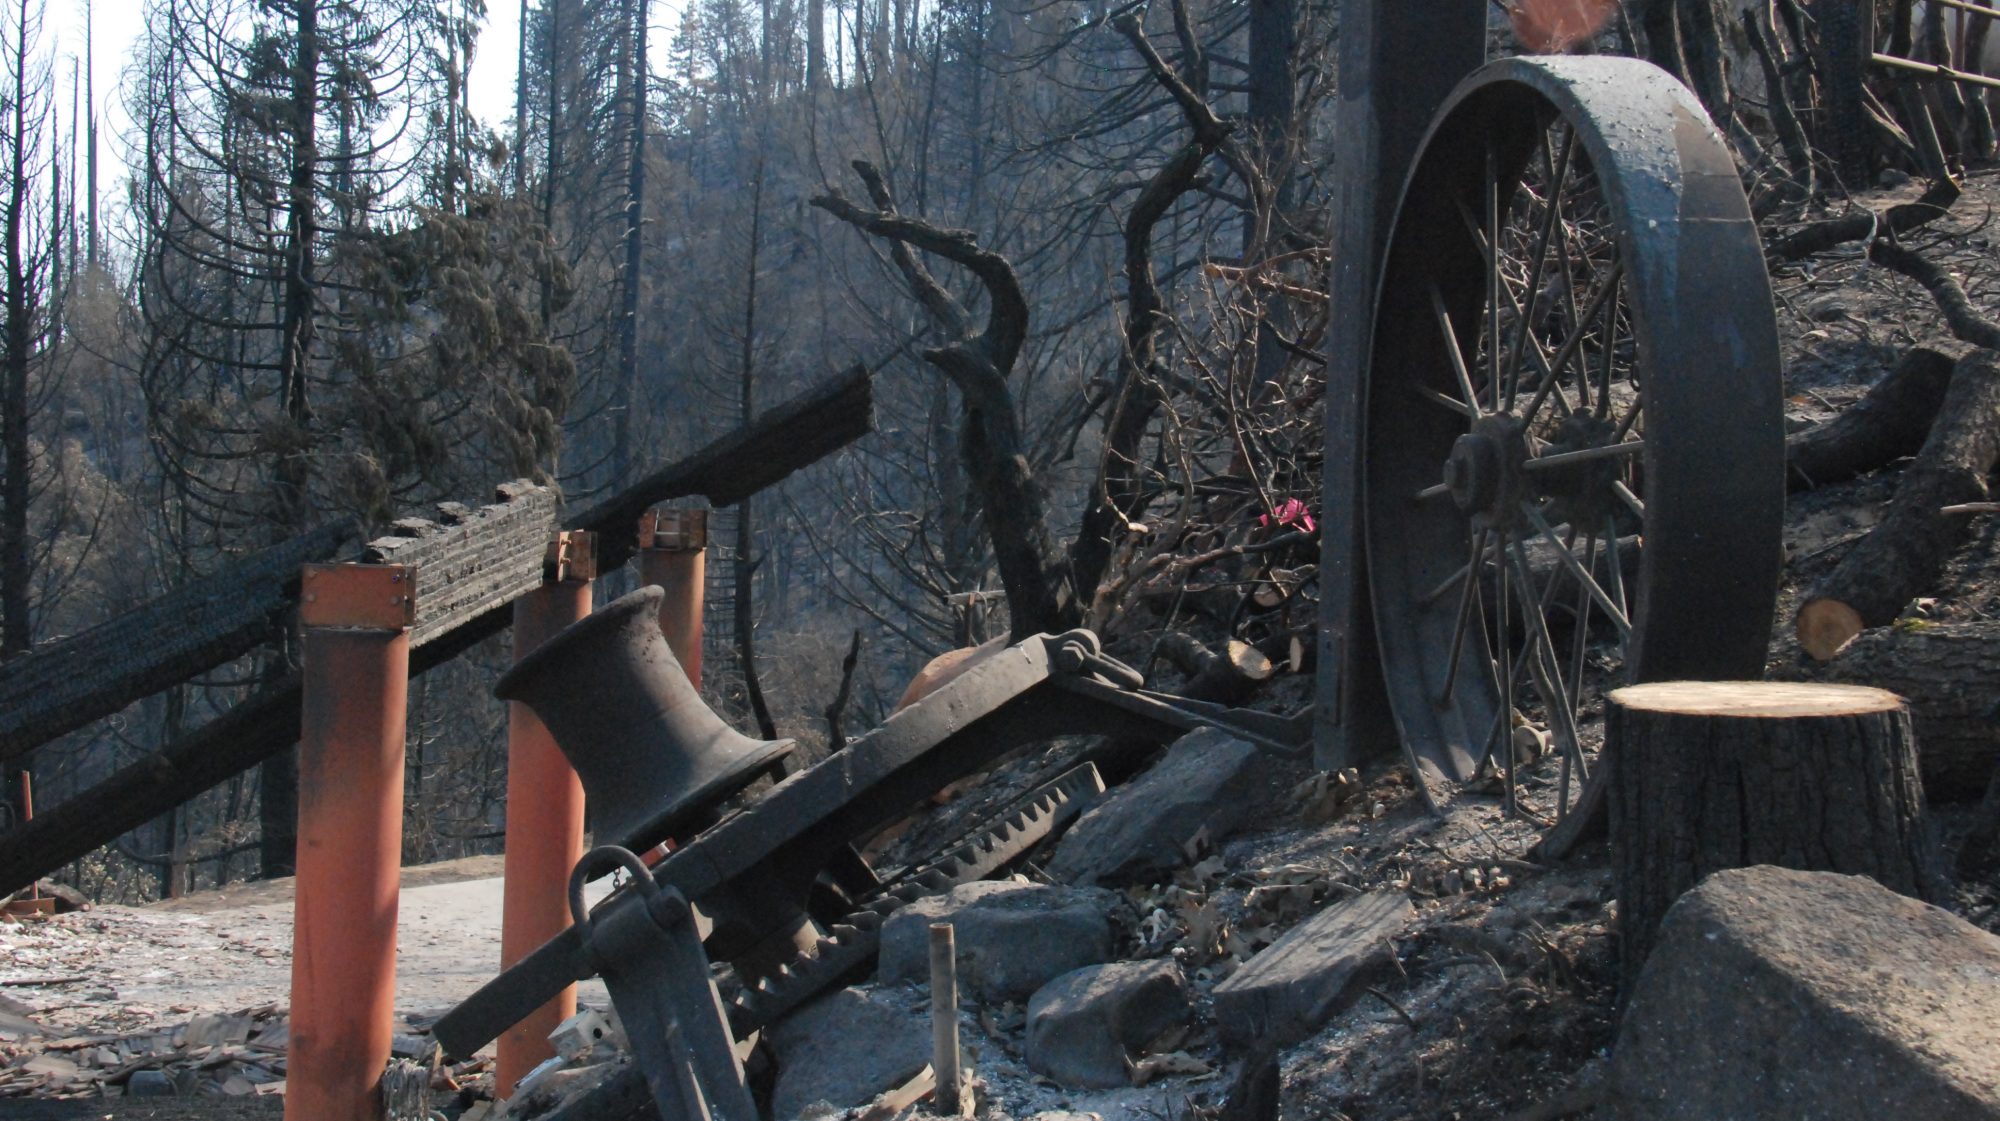
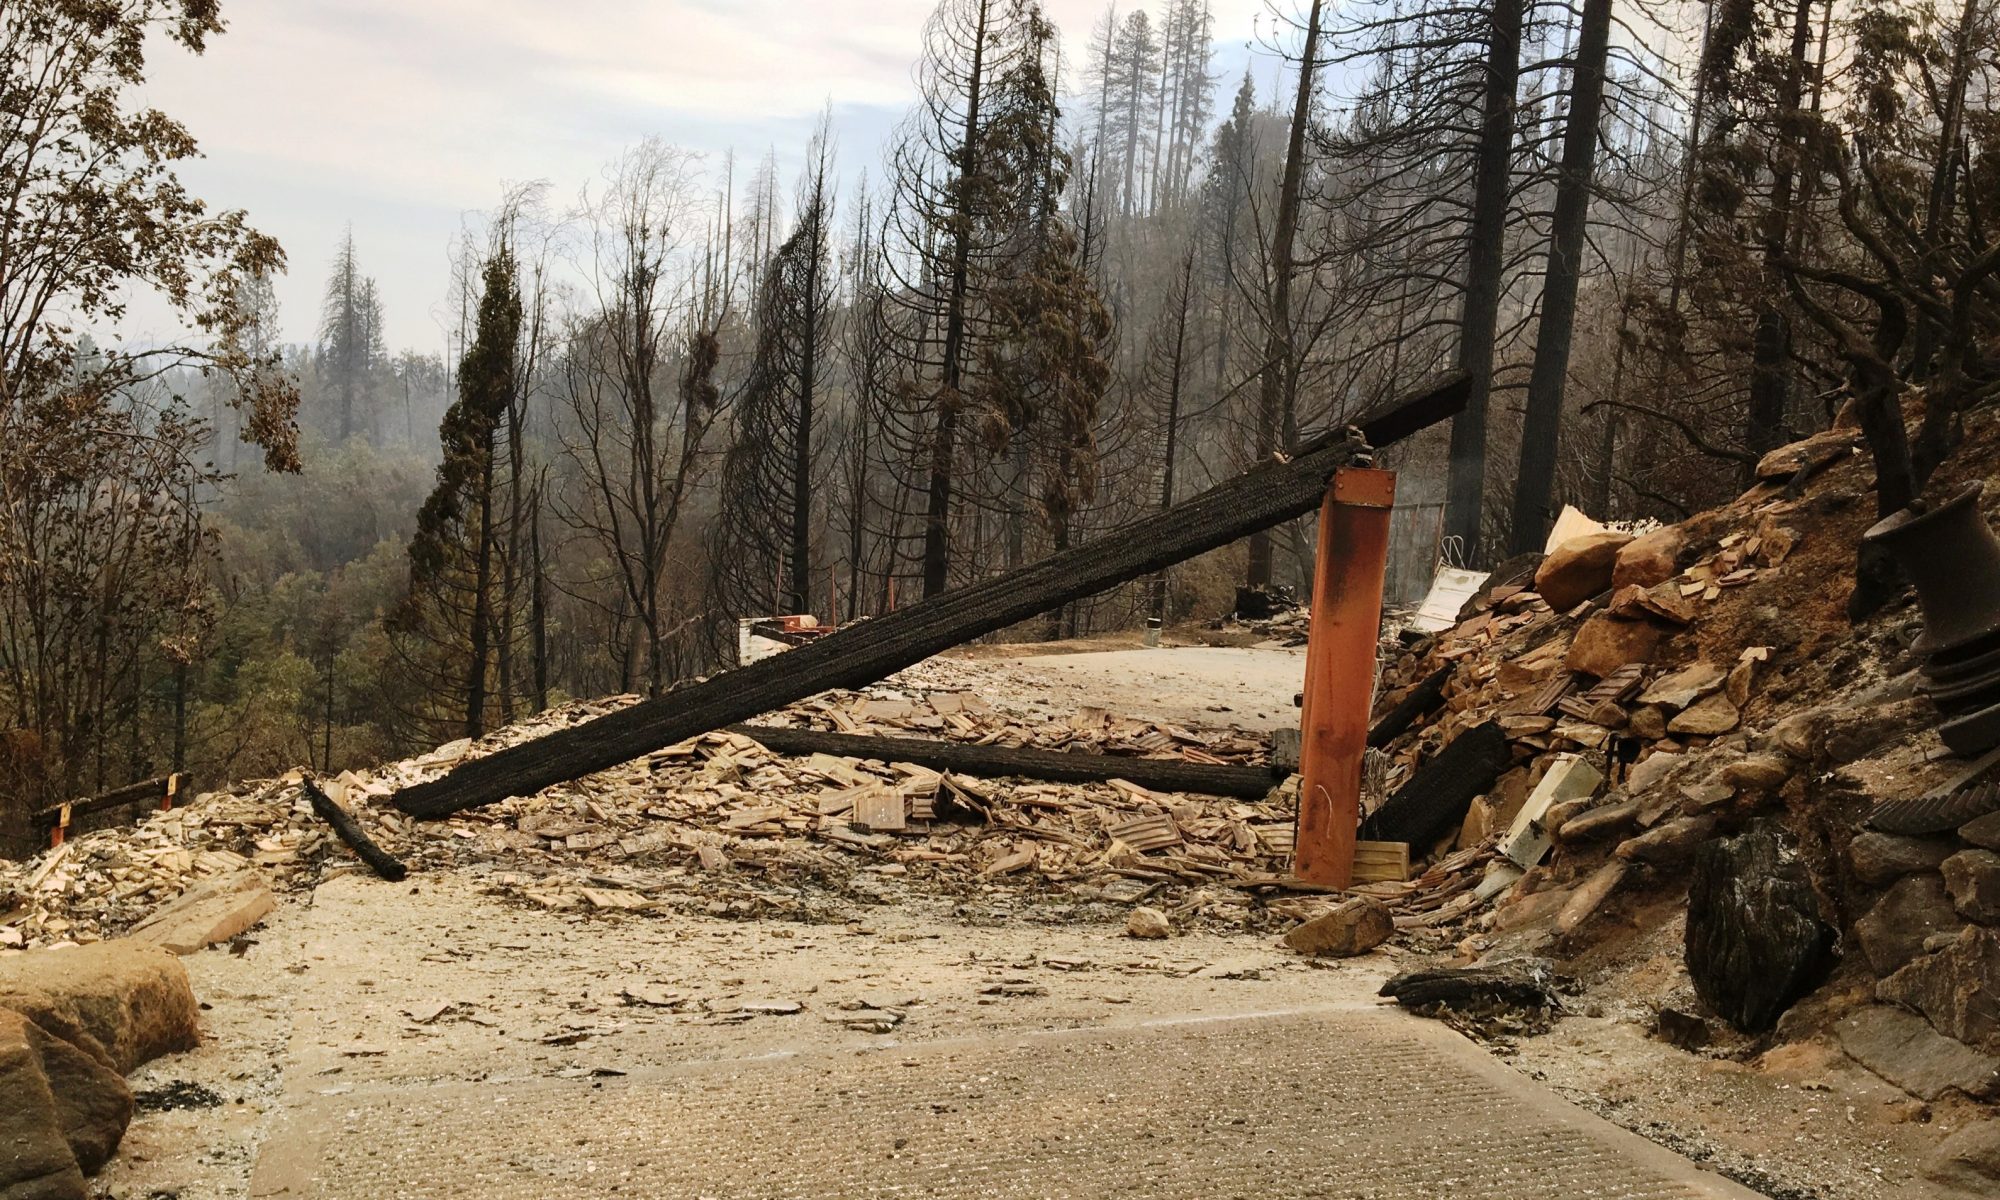
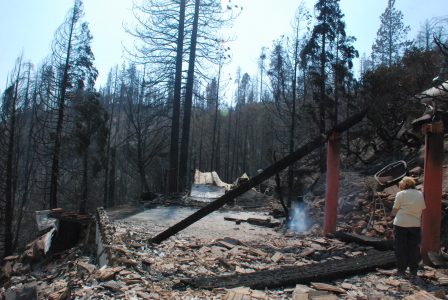
On our first visit to the Logger’s Retreat smoke and even open flame are still present 12 days after the fire started
In retrospect we now realize that the wreckage itself was both a symbolic representation of that frustration and a distinctly tangible source of it as well.
The tangible part being that it was, plain and simple, an enormous mess.
This is looking toward the laundry room and master bedroom from near the location of the front entry way.
A sooty, dusty, and possibly toxic mess as well. The house was new enough for asbestos not to be much of a concern. But before the fire there was a normal amount of lead, plastic and electronics inside.
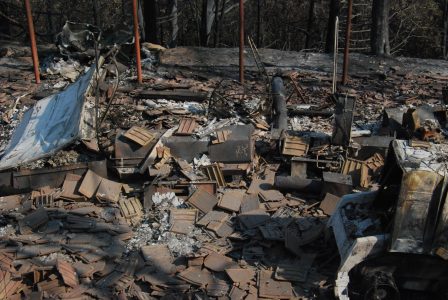
The remains of the garage and its contents, including the Bobcat with its brush and snowblower attachments.
It was impossible to visit the site and not come away covered from head to toe in black sooty dust. It was not a pleasant place to be.
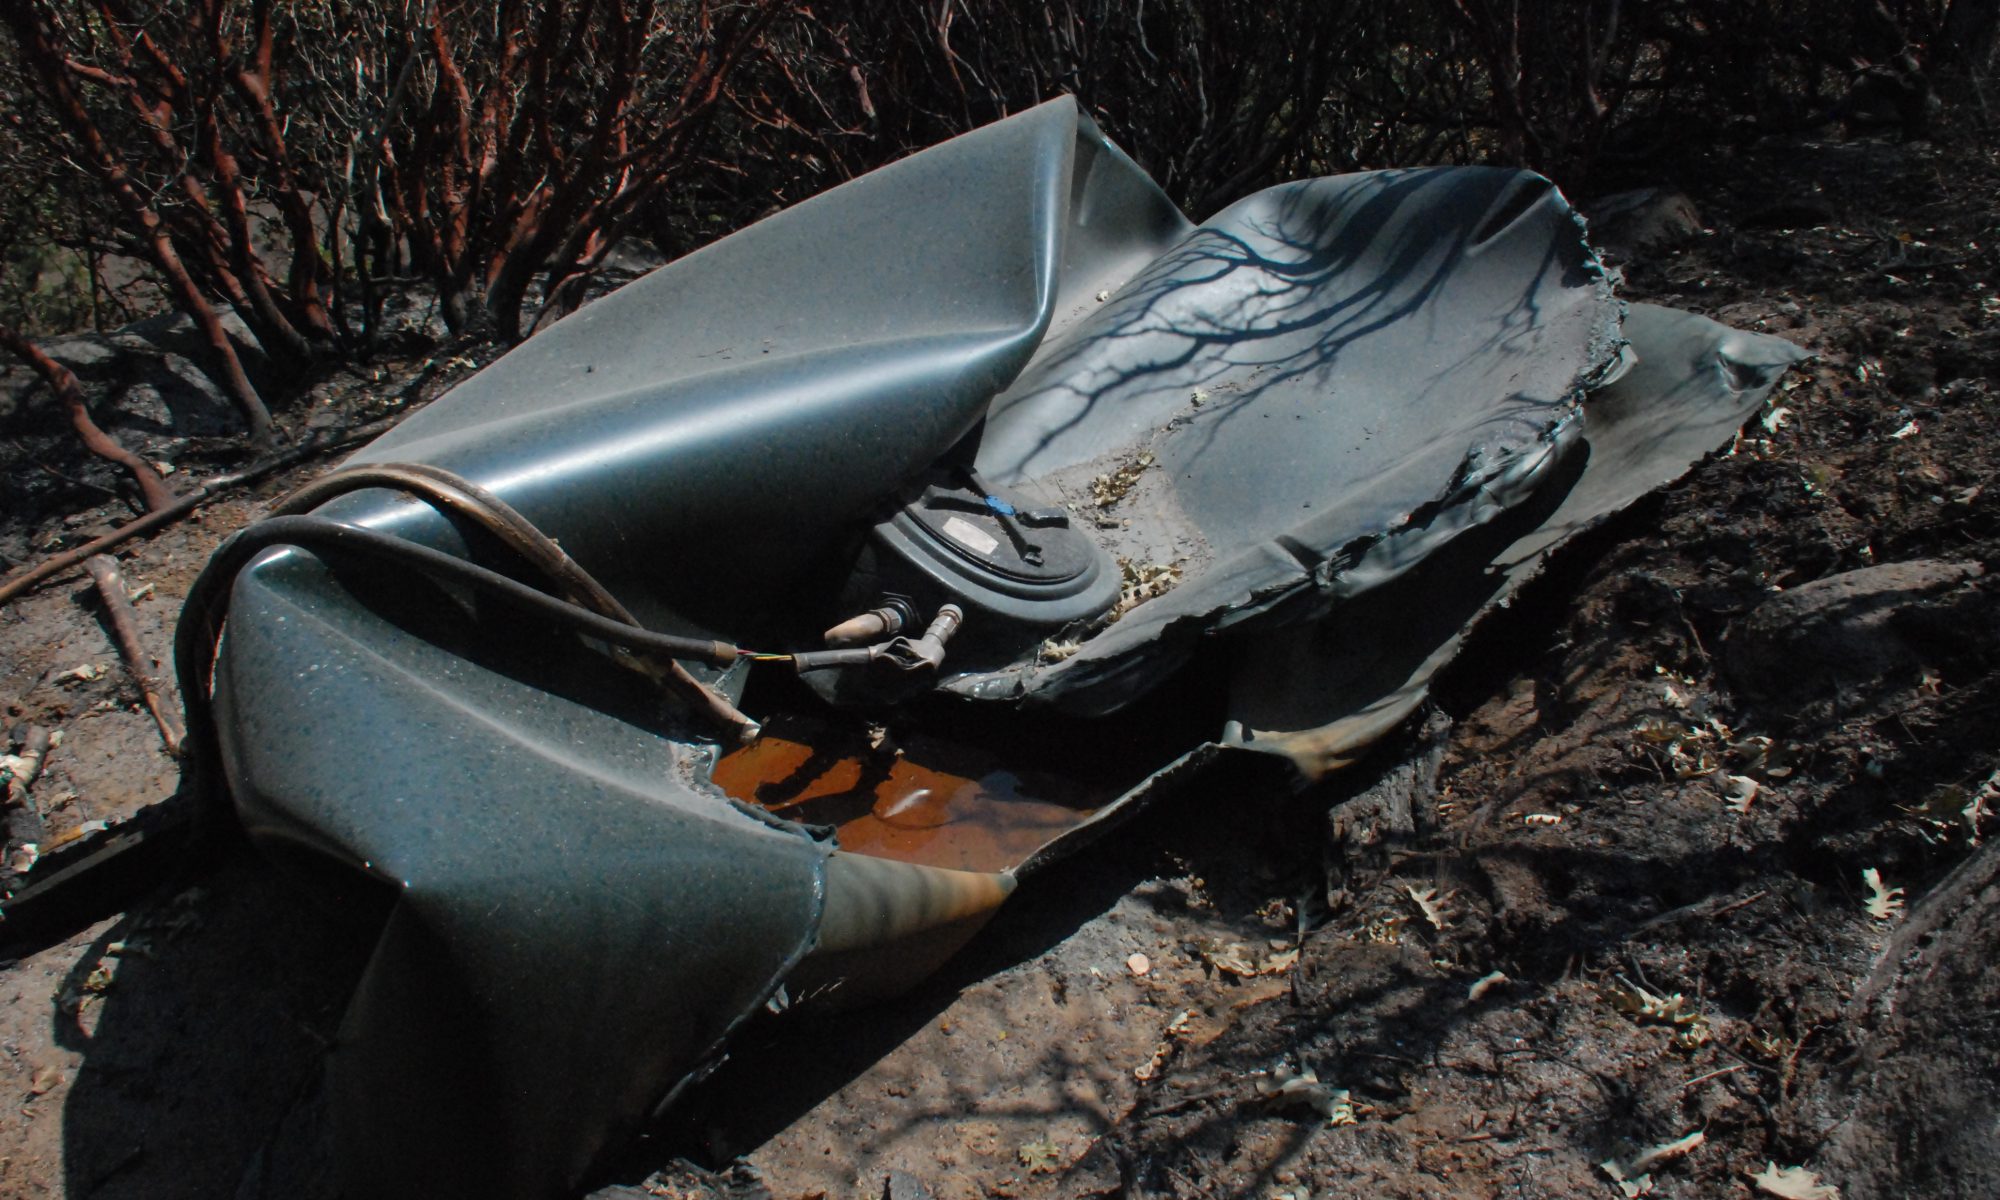
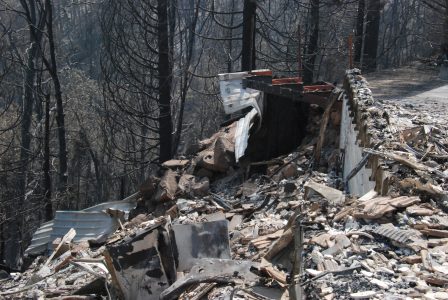
This was our hot tub, now little more than a heap of fiberglassThe remains of our pump house and pressure tank, with the fiberglass of the 5000 gallon storage tank in a pile beside it.
It was quickly apparent to us that we could not do much of anything until the site was cleared of all that debris. We could also see that this task was far beyond our own abilities. We had to have help.
We contacted several Fresno-area demolition companies, and even had some visit the site to provide an estimate. But after the visits, days went by. Phone calls were not returned. And the estimates never came in. More frustration.
I guess this job was as daunting to them as it was to us. The location on a hillside at the top of a steep driveway made it even more difficult. Weather was also a factor in that Winter was fast approaching. While we had no hard deadline on this, still we hoped that at least we could get the site cleaned up before snow and ice prevented further access until Spring.
The situation finally improved after we contacted David Knott Inc of Fresno.
Dave responded quickly with both a visit and confirmation that yes, they could handle the job. He also confirmed that they could begin work in October and expected to finish by the end of that month.
The quote was quite a bit higher than everyone expected (including our insurance adjuster), and Dave knew it would be. With apologies he explained that he couldn’t find a way to do it for less. Given the amount of work to do and the difficult location it would take him at least 10 days.
But at least he would get it done. Progress!
We didn’t really have another choice. We returned our signed agreement on Tuesday, October 10 and their work started shortly thereafter.
The Cleanup Begins
We were able to visit the site again on that following Friday. While we did expect to see some initial progress, what we did not expect was the psychological boost that progress gave us. It was just such a great relief to see some improvement, any improvement, after so many days of stagnation.
The breezeway is finally clear of rubble and charred timbersThe lower driveway and garage area are free of debris tooRubble is gone from the area below where the kitchen deck once stoodThe Bobcat is no longer surrounded by broken roofing tiles and charred attachmentsThe fiberglass pile that was a hot tub is only a memory now
We enjoyed the rest of our weekend, savoring a newfound sense of optimism.
I realize now that the symbolic part of all that mess was the greater, more general roadblock to our overall progress that it represented. And now that DKI was actually cleaning up the mess, they were finally removing that roadblock too.
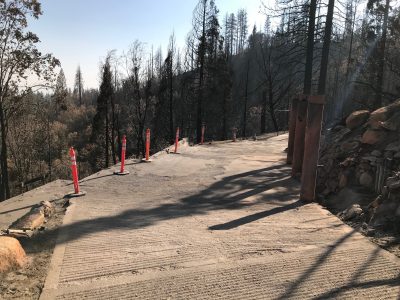
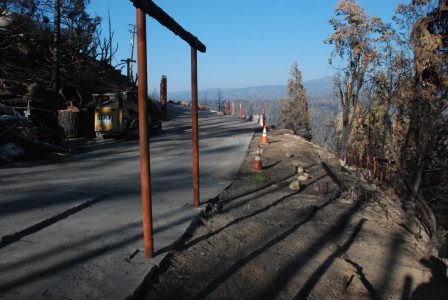
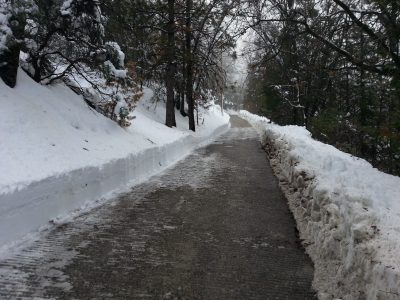
This is looking up at the steepest section of the driveway, just above the Trestlewood Chalet
Driveway snow removal remains my biggest near-term concern, but we have also made some progress there. (Emphasis is on the “some.”)
A Driveway Primer (for those who have never been to the Logger’s Retreat)
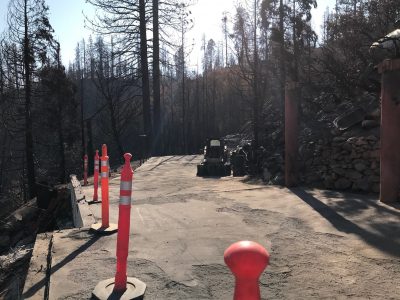
The driveway to the Logger’s Retreat is easily 1000 ft long and rises several hundred feet. The steepest section has roughly a 58 percent grade, meaning 58 feet of elevation change for each 100 ft of horizontal travel. It’s real work just to walk up that driveway, even without any snow.
As long as the driveway is free of snow and ice, it is usable. The property gets a lot of sun even in the middle of winter, so snow doesn’t tend to last long. But in winter months the night time temperature does regularly drop below freezing, and if the snow turns to ice the driveway becomes an ice rink — with a 58 percent grade no less. The only way to keep that driveway safe in winter is to keep it clean.
When we bought the Logger’s Retreat in 2006, I was surprised (and somewhat excited) to learn it would include a Bobcat and a few attachments, including a plow blade.
I didn’t realize it at the time, but the reason the Bobcat came with the house was that it was essential; there is no other practical way to clear that long, steep driveway of snow.
And another important point that you may not realize: you simply cannot plow snow uphill. Certainly not on a 58 percent grade anyway. There you have to work with gravity, not against it.
So we kept the Bobcat and all its winter attachments at the top of the hill, in the Logger’s Retreat garage. Plus, the garage provided shelter. It provided lighting. And power. I could work on the equipment there, in relative comfort, at any time of day or night. I could keep the Bobcat’s battery fully charged.
Trust me, you don’t want to hike all the way up that hill, through deep snow, and then find the battery is too weak to start the Bobcat. “Been there. Done that.”
After The Fire
But now there is no garage at the top of the hill. No shelter, no lights, no power. There is no Bobcat either, for that matter.
Well it is still there, but it’s not in very good condition.
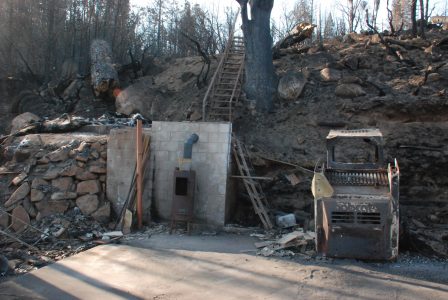
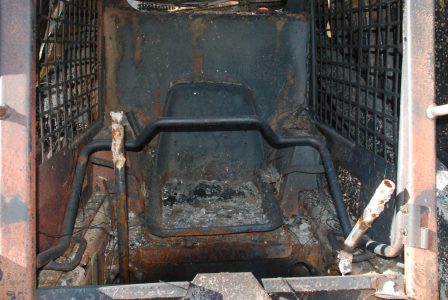
The cab of our Bobcat 843 skidsteer, looking a bit worse for the wear.
And its battery is gone too, save for the solidified puddle of lead left on the floor behind it.
You might think that this is no big deal, because the Logger’s Retreat itself is also gone. No one will stay there this Winter; no need to clear that driveway!
You would be half right. (The upper half to be precise.) But the Trestlewood Chalet is still available for guests. And we still need that income, particularly during the slow season, when cash flow can be an issue. Christmas, New Years, MLK and Presidents Day holidays are the most popular rental periods in the winter. In part because of the prospect of snow. Hmm.
I still need to keep the Trestlewood Chalet accessible by car. I still need to keep (at least) the lower half of the driveway clear of snow.
Driveway Progress, Part 1
Step one was to replace the Bobcat.
If there is one thing we do appreciate (and there aren’t many) about living near a big megalopolis like Los Angeles, it is that when you need something, even something kind of obscure, chances are you can find it nearby.
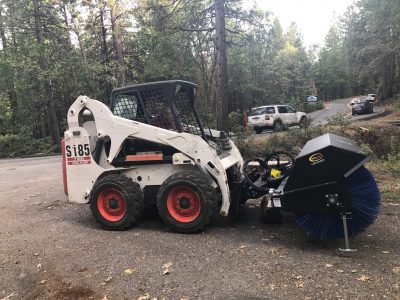
Within two weeks of the fire I had found and purchased a used Bobcat S185 skidsteer with high flow hydraulics from Rexin Equpment in Long Beach CA.
The high flow hydraulics are an important feature to have when using certain attachments — like a snowblower for instance.
Not only did I get a reasonable price from Rexin, but delivery from Long Beach to our driveway was included (thanks Javier)! Solving the delivery problem was a key factor in sealing the deal for me. I do like one stop shopping!
Driveway Progress, Part 2
By mid-September I had ordered replacement attachments as well. The most important of these are a snowblower and a broom. We need the snowblower for obvious reasons. We need the broom to clean off the small amount of snow and slush that remains after the snowblower has done its job. Without the broom to sweep off those remainders, you’ll still end up with an ice rink.
The attachments had a 3-to-4 week lead time, which put them arriving in the first or second week of October. It turns out they shipped early (that’s not a problem), without any warning (that is a problem).
And due to a typical shipping SNAFU they first tried to deliver them to our residence in Altadena. The driver suspected something was not right when he realized he was trying to deliver a 1000+ lb snowblower to a residence in Southern California. Lot’s of snow there (not)!
After correcting that SNAFU, we received our first attachments near the end of September. Yay!
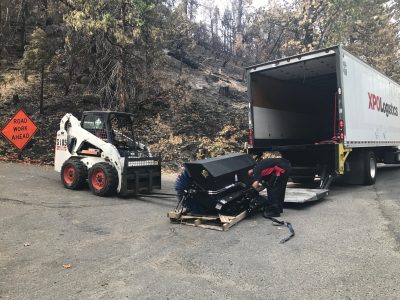
Using the new (old) Bobcat to unload the Quickattach angle broom from the delivery truck.The broom is assembled and attached!
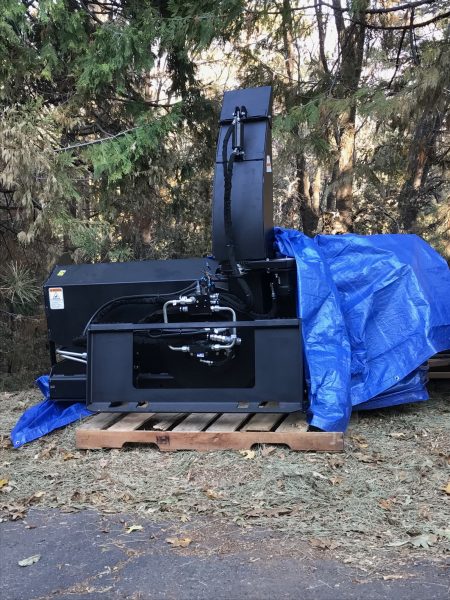
And about a week later we had the snowblower too.
Our assembled Quickattach snowblower — it’s a beast!
I had two small mysteries to solve with the new attachments.
The first was that while the broom itself would spin just fine, I could not change the sweeping angle from side to side. Without that ability, the swept-up debris would just accumulate in front of the broom. That’s not very useful.
Since the Bobcat is “old” (i.e. used) but still “new” (i.e. unfamiliar) to me, I couldn’t tell whether the problem was in the attachment or in the Bobcat. A phone call to Quickattach provided me with the (essential!) wiring diagram for the attachment, and the oracle Google eventually provided me with a PDF of the (essential!) Bobcat S185 service manual.
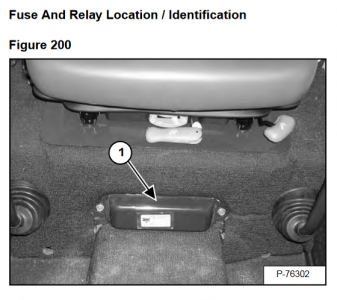
On my next visit to the property, a bit of sleuthing with a voltmeter verified that the attachment was wired correctly which meant the Bobcat was the culprit. The ground return side of the Bobcat’s controls checked out as well. So that left only the power side. Occam’s Razor suggested to me that the fuse box was the next place to look, but of course at that time I didn’t know where the fuse box was.
The location of the fuse box (yes that is the operator’s seat at the top of the image!)
Oh yeah, there it is.
On the next visit I came prepared with my new knowledge of the fuse box location as well as some extra fuses. Sure enough that fuse was blown. Now the broom has angle control!
The second small mystery was with the snowblower. We connected it and confirmed that the snowblower’s fan and auger would spin. The chute rotated too, but way too fast. Then I enabled High Flow hydraulics. The Bobcat’s engine labored and the auger slowed down. That didn’t sound right.
Back home on the following Monday morning, another call to Quickattach solved this mystery. I described the symptoms and immediately the answer came back that Quickattach had swapped the flat-face connectors. So we were pumping hydraulic fluid through the snowblower backwards.
The fix is simply to swap the connectors. So we’ll do that on our next visit.
Of course the Logger’s Retreat garage is still gone, but at least now we have the tools we need to clear the driveway of snow.
This is another view of that steepest part of the driveway, taken last January after about 4 feet of new snow.
Unfortunately Nature’s recovery efforts alone won’t rebuild the infrastructure we’ve lost. Or plow the driveway. Still, we’re making some progress on these as well.
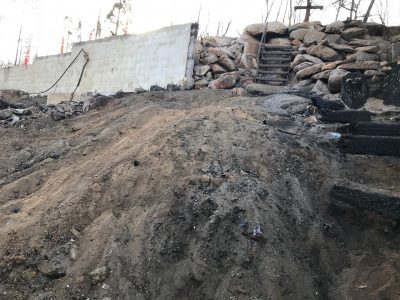
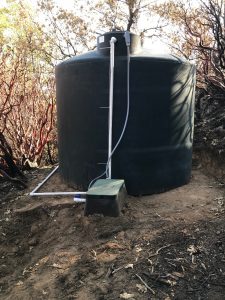
Behold the new water tank for the Trestlewood Chalet!
We were under a hard deadline to replace the Trestlewood Chalet’s water tank, as guests were scheduled to arrive late in the third week in September.
We asked Dave at H&B Drilling in Oakhurst if they could replace the tank and get the system back online before the guests arrival.
Dave said he could, even though their schedule was already crammed full after so many other residences had also lost their tanks in both the Railroad Fire and then the Mission fire near North Fork.
Not only had the Railroad fire melted our tank, but it also damaged the plastic water line in many places along the route between the house and the tank. Finding and repairing those sections turned out to be an unexpected challenge.
But first they had to cut up the melted remains of the old tank just to remove it. A chainsaw quickly solved that problem. Next, they had to recruit several additional hired hands in order to roll (by hand) the new (empty) 2500 gallon tank about 100ft across the steep hillside to get it to its leveled pad.
Dave and his assistant then plumbed and wired up the new tank, but it took them much of the next day to find and replace all the leaking sections of the water line. They nearly ran out of connectors but finally, 1 day before our deadline, the Trestlewood Chalet had water again!
Just last weekend my wife and I were finally able to insulate and re-bury the repaired water line. So now that part at least should be ready for freezing weather.
To protect the shutoff valve and remaining above-ground plumbing from the cold I added the irrigation control box shown in the photo above. To that I also added auxiliary valves and a clear plastic standpipe, so that when needed I can view the actual water level inside the tank.
All that remains now for winterizing the Trestlewood Chalet’s water system is for us to stuff that box full of insulation. I’ll have to leave that task to our next visit.
Well it’s been several weeks since my first post. The initial feedback I’ve received about this blog from family and friends has been positive and encouraging; thank you all for that!
Writing about this process does not seem to be as difficult as I thought it might be; there are always new developments to write about. Rather it is dedicating the time to write them down that seems to be the greater challenge.
Green Is The New Black
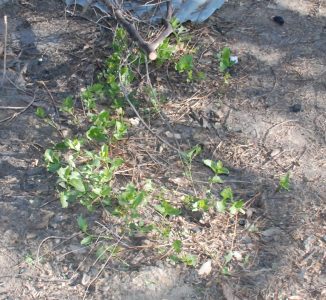
This vinca was the first green to appear after the fire
Some of the most remarkable developments over the last month are the natural ones. And of course they just happen all by themselves, requiring none of my time at all! I really like that particular aspect of Nature.
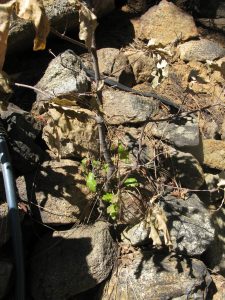
Quite literally, within the first week after the fire — even while the remains of our railroad-tie retaining wall still burned — our caretaker noted a small patch of vinca had reappeared near the ruins of our hot tub.
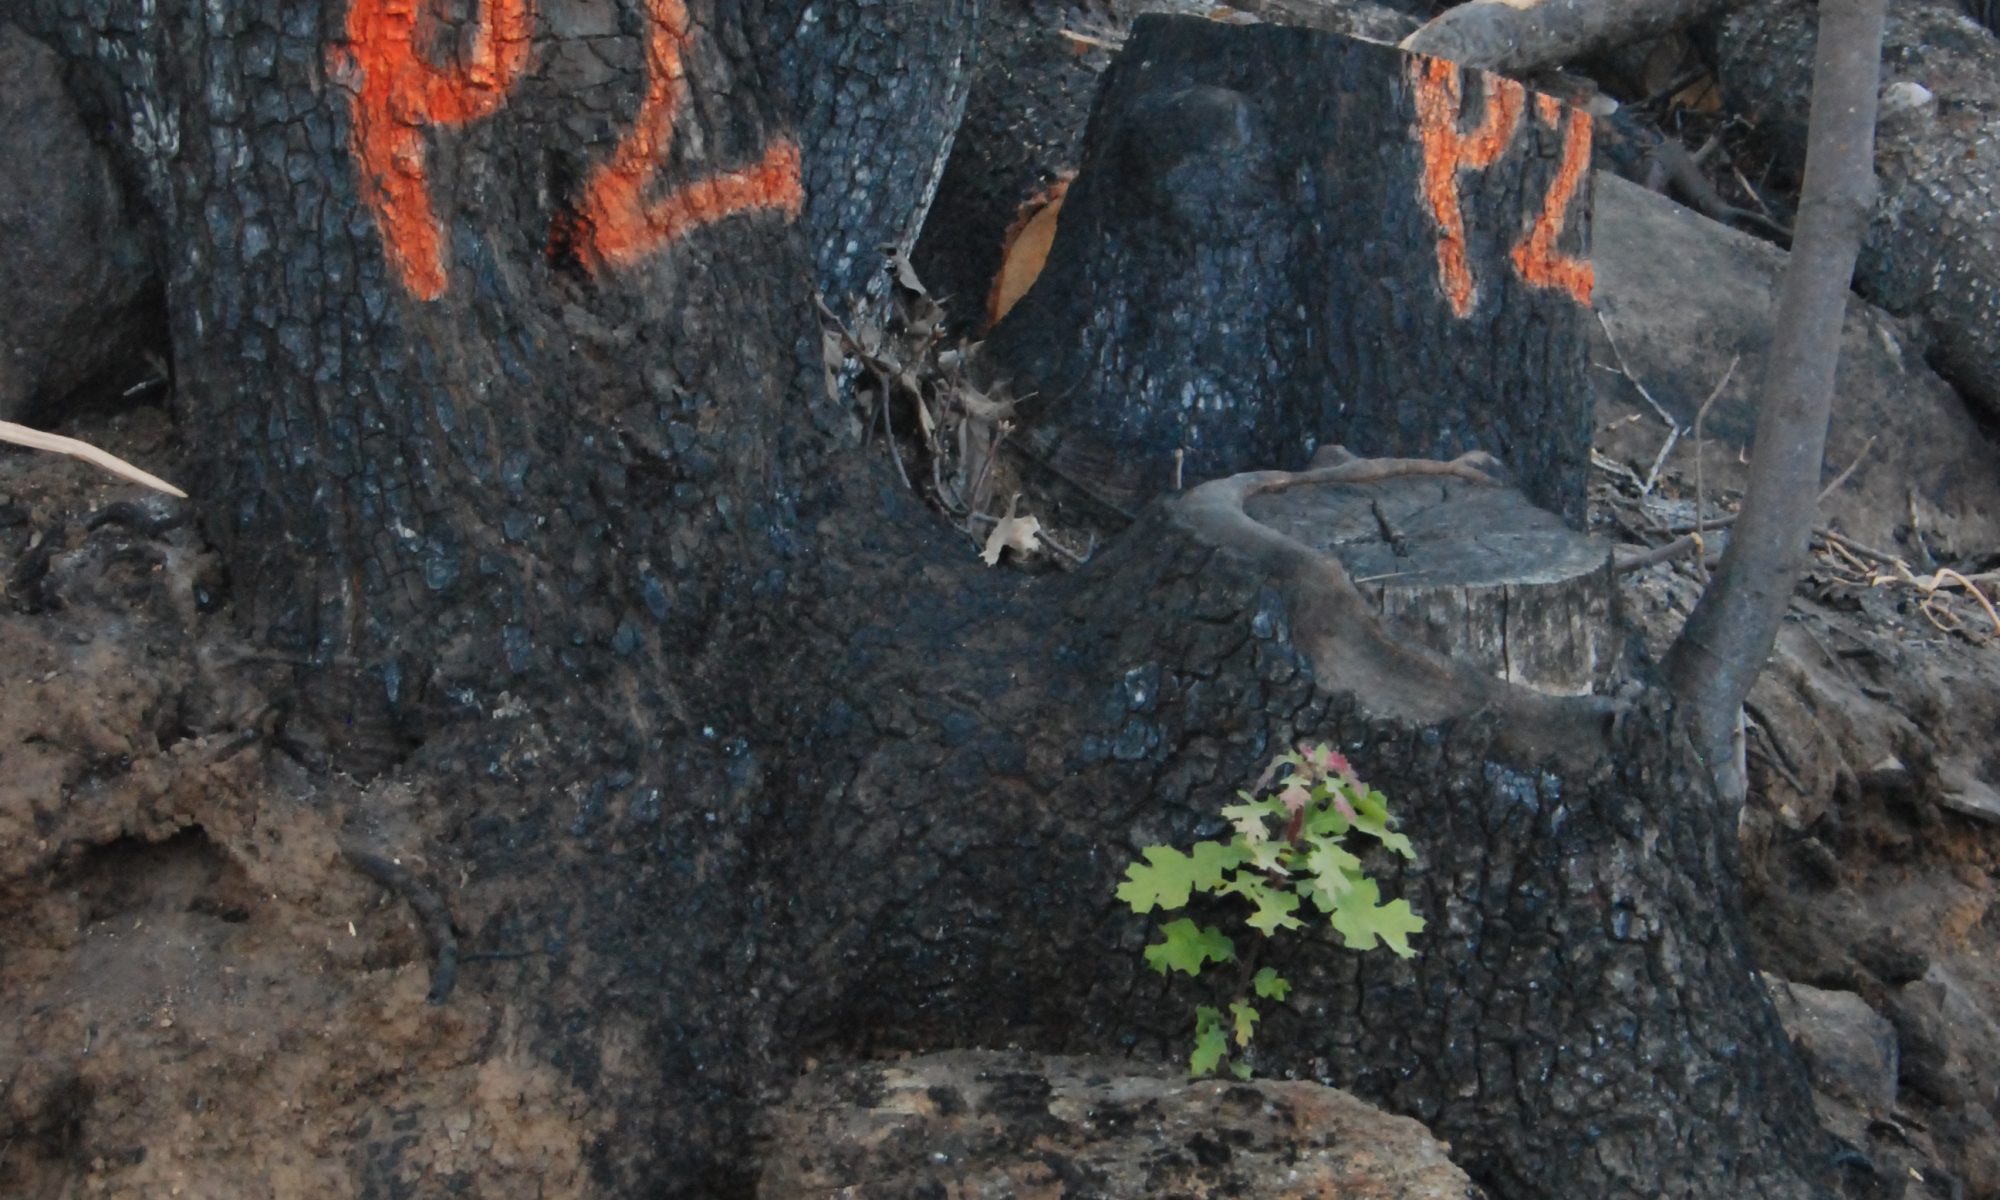
This is the tiny oak my brother found while inspecting the property in mid September.
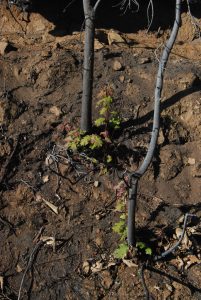
By far the most aggressive flora seem to be the oaks. Not three weeks after the fire started and while it continued to smolder on our property, my brother found a tiny green sprout down by the picnic area.
A landscaper and arborist by trade, we had asked for his advice on how to best to mitigate erosion and replant the property. Among other things, his research suggests that conifers will have the most difficulty coming back, so those species will need the most nurturing.
Even Jacob Tallmon, the Madera County sheriff’s officer (and the last person to see the Logger’s Retreat still standing), had told me in passing that the oak trees would take over if left unchecked. It appears he may be right.
Here are two more oak sprouts enjoying their new, uncrowded surroundingsAnd now it is clear the oaks were not daunted much by this fire
About That Erosion Thing
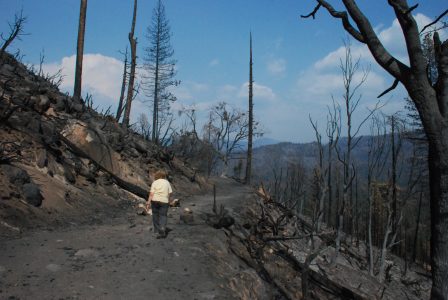
Initially we were quite worried about erosion, given that much of the landscape (which incidentally is directly above the Trestlewood Chalet) is now essentially a steep and naked hillside. I was concerned that a big rain this Fall might create mudslides large enough to threaten that house.
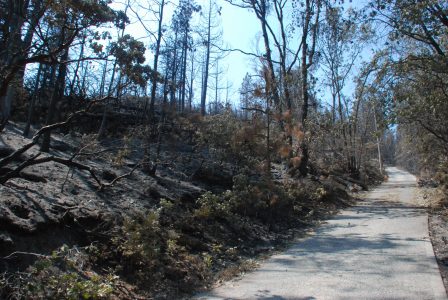
This is actually up the fire road a bit from our property, but still illustrative of the general erosion threat.
We briefly considered mitigation techniques such as covering the slopes with hay. I think one suggested application rate was on the order of 60 bales per acre. That’s a lot of hay (and a lot of work)!
But over time other options have become apparent, and many of those use existing materials on site — a big plus in my mind. For instance simply dropping dead trees across the slope helps stop erosion channels from forming. We’ve still got plenty of trees to drop. Also we learned that chipping the “slash” (smaller branches and bark) and then scattering the chips helps control erosion.
My brother pointed out that the areas at highest risk for serious erosion damage were at the steep slopes along the driveway itself. A washout on the driveway would be no fun at all.
Then the PG&E tree trimmers came back with their chipper. What did they do with it? They chipped their slash and shot much of the chips along the sides the driveway — right where I would have wanted it to go. I guess these guys know what they are doing.
Another thing I’ve noticed as we have worked on the property during the last month is that even though the hillside looks barren, the forest floor itself is still a solid mat of intertwined roots, branches and decaying bark, often so thick it is hard work just to get a shovel through it. And even though the above ground parts of trees and bushes have burned away completely, their stumps and root structure are still intact underground. I don’t think that hillside is going to move very easily.
I’m no longer too worried about erosion. If we find spot problems, we’ll address those individually. And even if we were to get an actual, full-blown mudslide, I doubt if any hay or wood chips we might scatter would really make much of a difference there anyway.


 Dave responded quickly with both a visit and confirmation that yes, they could handle the job. He also confirmed that they could begin work in October and expected to finish by the end of that month.