June was a month with a lot frustration, but also some success. For example, despite our best efforts, our permit to repair the forest service road behind the house remained completely stalled due to bureaucratic logjams within the Forest Service. Everyone involved agreed that we needed to act fast, before the streams dried out. And yet week after week, there was no progress. At all.
Still we tried our best to make our own progress wherever we could. Most of this was on the build site itself.
Grade A Road (or two)
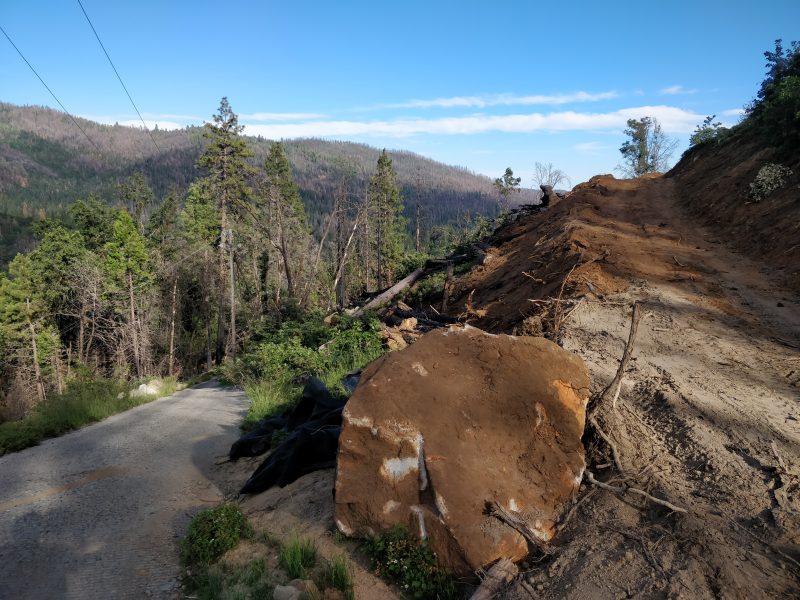
Before we could start building we needed to stabilize the hillside just below the main home building site. You may have noticed that rocks (of all sizes!) are quite easy to come by on this building site. So our plan was to use those native rocks to build the retaining wall.
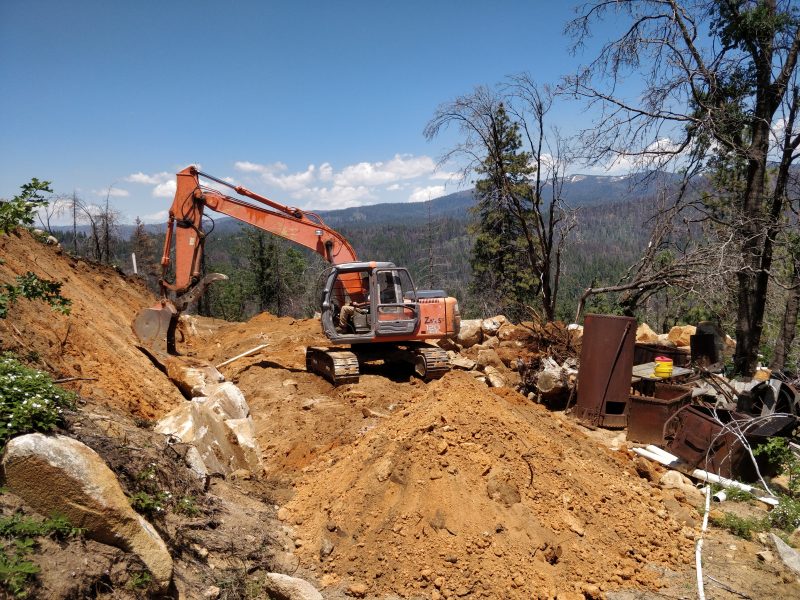
This area was where last year our grading contractor had cut into the slope while expanding the old picnic area, to create a larger flat area that would become our new septic system drain field.
That grading contractor suddenly bailed on us in May, just as the weather was allowing us to resume grading work. Fortunately though we were able to retain a new grading subcontractor for this work. He turned out to be an excellent choice.
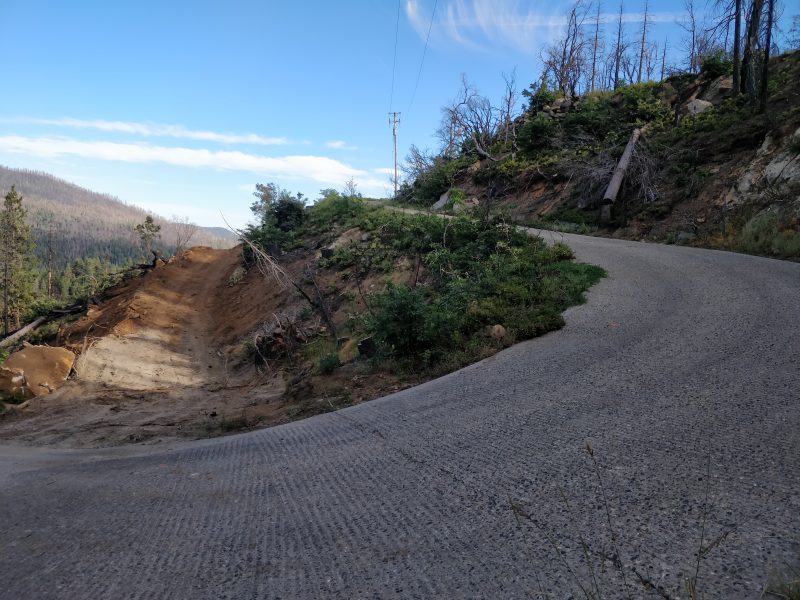
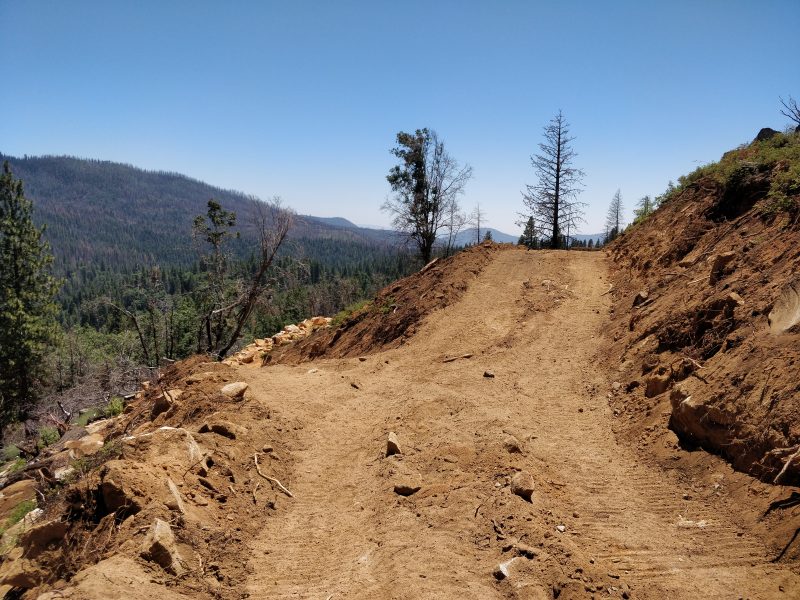
But the new grading contractor had to be able to get his equipment where we needed it,. So his first task was to finish the access road started by our previous grading contractor. The new guy made short work of that task.

Grade A Wall
Our grading contractor started building the wall by placing the largest boulders available at the very bottom of the cut slope. Then he carefully, patiently stacked additional boulders on top of those, slowly working his way up the slope.
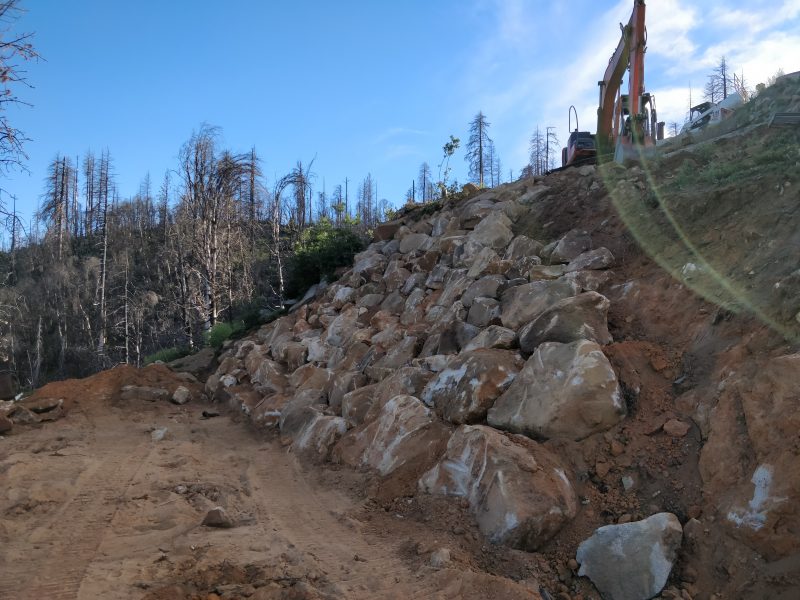
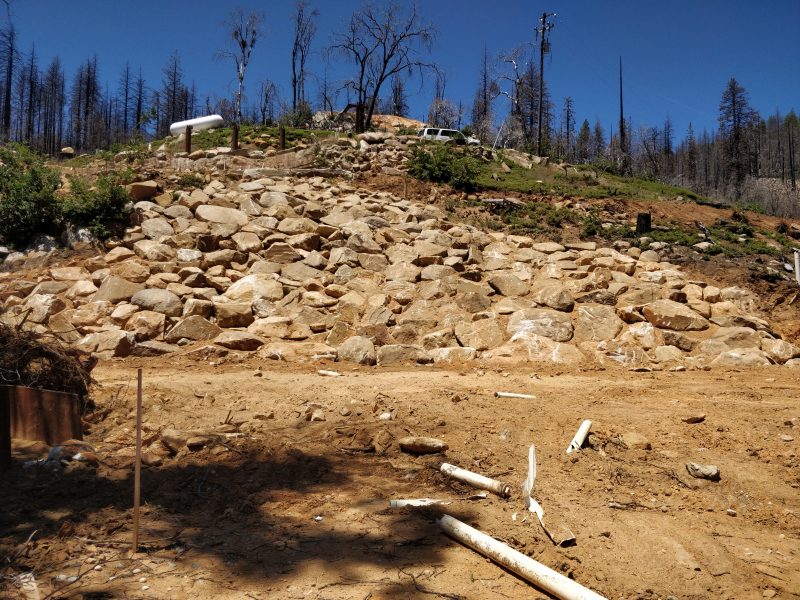
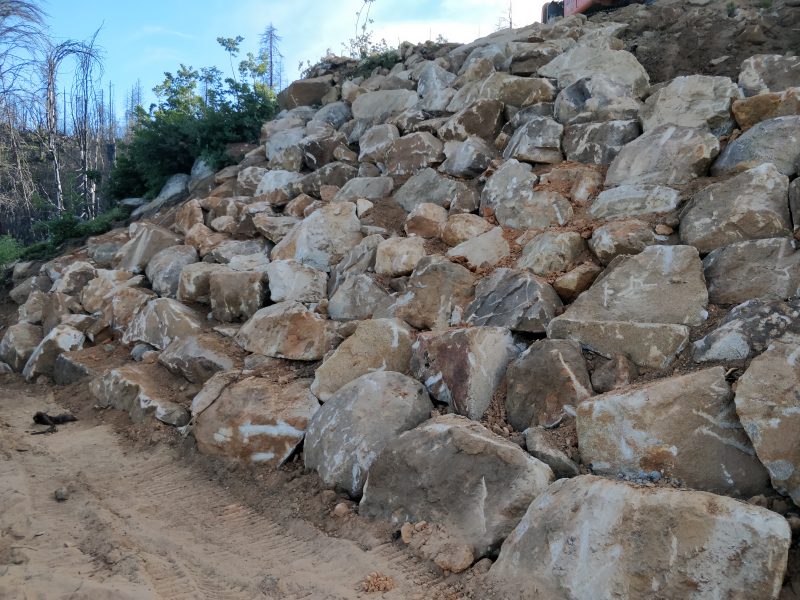
It took the grading contractor about 2 weeks to complete the rock wall. We rated his efforts “Grade A.” We were so happy to see this finally finished!
Another Clogged Pipe
As the calendar quickly progressed from Spring into Summer the building site dried out, turning a muddy mess into a dusty mess. It was clear to all of us that the builder would need water on site in order to compact fill dirt and even just to control dust.
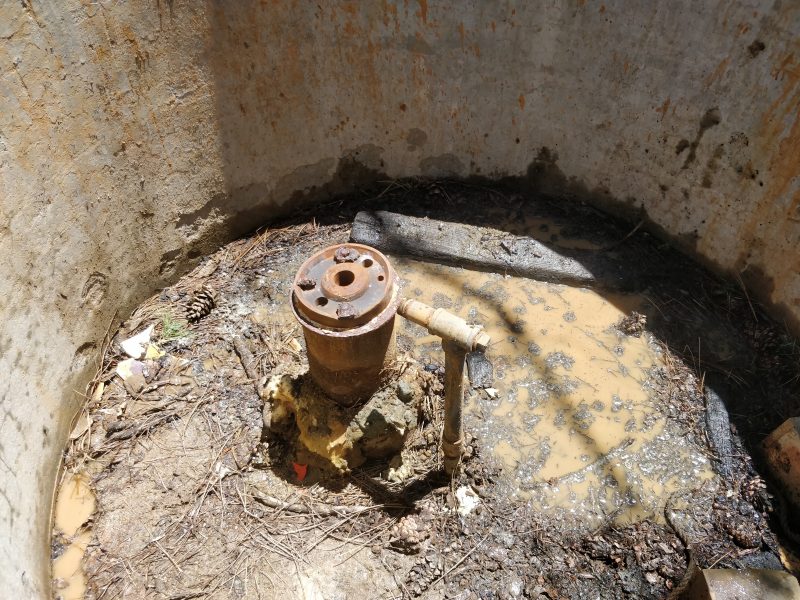
We have a water well, but the well head was damaged in the fire. We also have no electrical power on site, other than portable generators. But we do have a gravity-fed source of water on site that runs year round, all by itself. This is what the septic system engineer had used for his percolation tests back in January.
That water source seemed like the ideal solution to our current water supply problem. Unfortunately the March rains had clogged it up again, reducing the flow of water through the line to barely a trickle.
Back then I was able to restore flow by attaching a string of garden hoses to the outlet, running that hose down hill, and then using the force of gravity on the water inside to essentially suck a mix of water and the mud restriction through the line, flushing it out.
In January this technique worked well enough to clear the line. After we cleared the line, the resulting flow rate was pretty comparable to a typical garden hose. So when I learned that the supply line was clogged again, I assumed this technique would again flush out the clog and give us garden-hose flow rates.
But I assumed wrong. This time, trying to pull water through the supply line only seemed to make the clog worse with each attempt.
Time to look for a new strategy.
On closer inspection at the spring-water source we found that something (probably sticks, branches, and other storm debris) had poked holes in the intake bucket’s filter screen. This allowed coarse-grained sand to fill the bucket, which then got sucked into the supply line when I tried to clear it.
Emptying the bucket of sand was the easy part. But now how to remove the clogging sand from 500 feet of long-ago buried water pipe?
Our next attempt was to try flushing out the sand from the intake end. A trip to what is fast becoming my favorite local Fresno-area hardware store (which caters to San Joaquin Valley agricultural customers) allowed us to purchase a 100 ft reel of 3/8 inch ID clear vinyl tubing and the appropriate brass fittings to connect that tubing to a garden hose. (Try finding all that at your local Home Depot.)
This time I used one of the garden hose sections to create positive pressure instead of vacuum. I hauled the inlet end of the garden hose far enough upstream of the intake bucket to establish a reasonable flow of water (again by gravity alone). Then I attached the 100 ft length of vinyl tubing to the other end of the garden hose.
I inserted the (now spurting) free end of the vinyl tubing into the inlet end of the clogged supply line, and was immediately rewarded with a backflow of regurgitated mud and sand coming up and out of the clogged pipe. Encouraging!
Using this method we were able flush out sand and mud from about the first 10 ft of the upper end of the supply line. Beyond that I was able to force the tubing another 30 ft or so down the supply line.
I was hoping this would break through the clog so that water again would start flowing down the line as before, flushing out the mud and sand as it had back in January.
Alas we were not able to break through. Furthermore, by forcing the hose down the pipe into the clog, I may have actually just compacted the obstruction, now making it even harder to clear.
Try Try Again
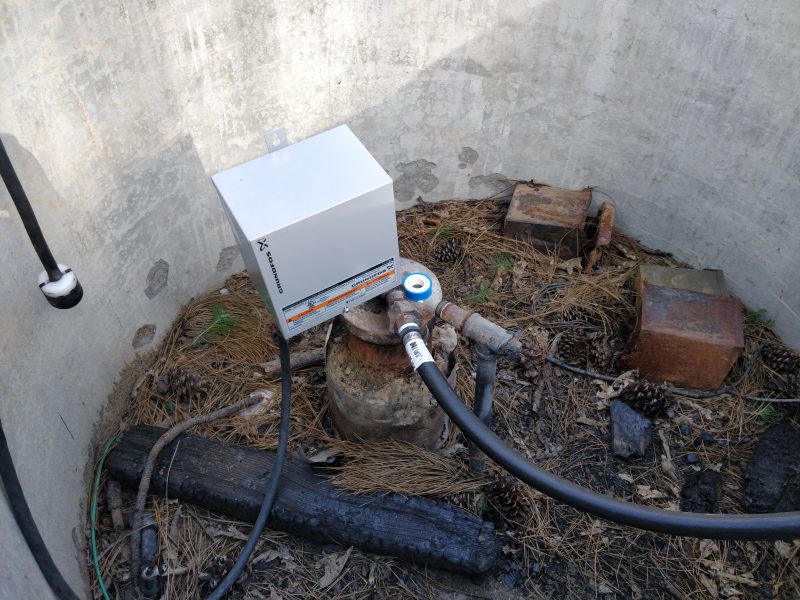
My well pump contractor thought that pressurizing the supply line from below, (reversing the normal water flow direction) might push the clog back out the intake end, or at least loosen it up.
The challenge with this concept is building up sufficient reverse water pressure on site — with no AC power readily available.
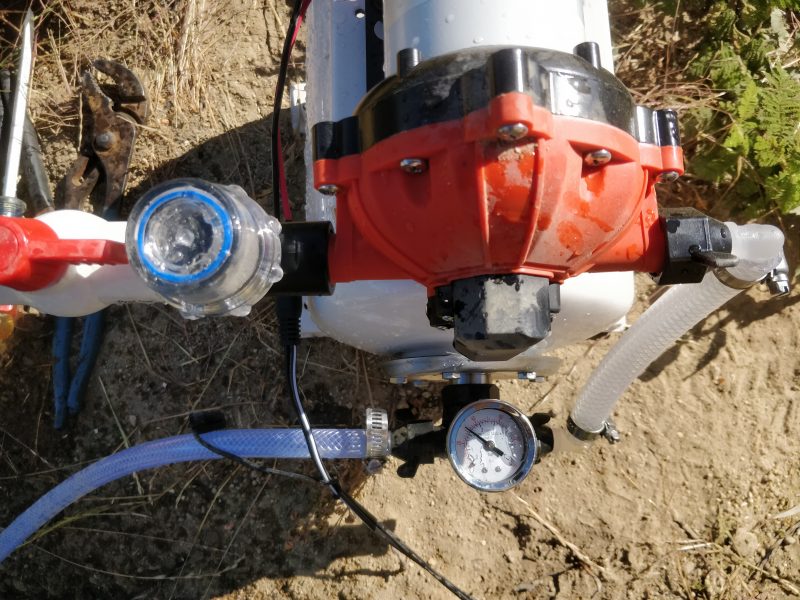
Amazon provided a fast-delivery solution in the form of a small water pump and pressure tank designed for marine and RV use, which was rated to deliver up to 60 PSI from a 12v DC power source. Truly portable; I can run it off of a car battery.
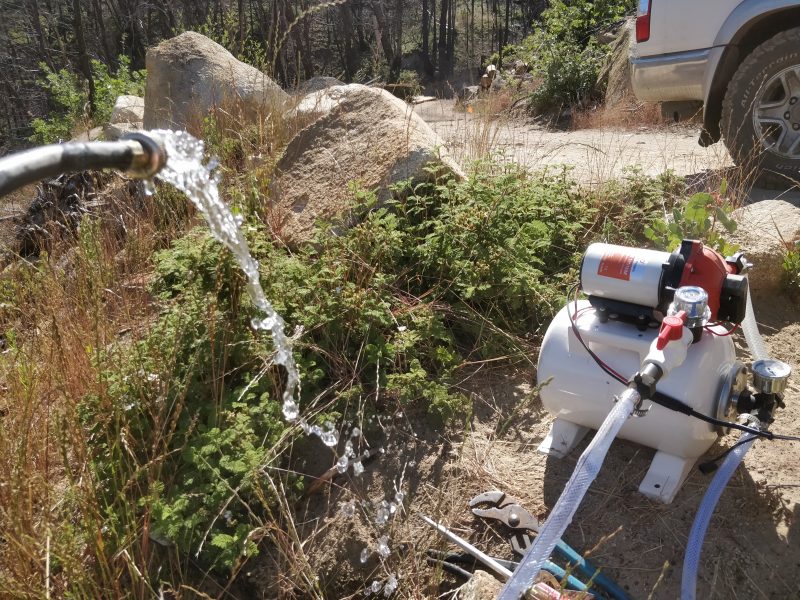
It’s really a pretty nice little pump. It’s self-priming — drawing water up from as much as about 10 feet below the pump.
Charging nearly the entire 500 feet of supply line to 40 psi or so made quite an impressive “gush” of water when the pressure was finally released. But impressive as that was, unfortunately all that backpressure still did nothing to dislodge the clog. Nothing at all.
Grrr.
Ever the optimist, I periodically tried again to pull water through the line from below using gravity (like we did to clear the line last January). Each time we would attach about 300 feet of garden hose to the lower end of the pipe, and then extend the hose all the way down the hill.
Each attempt would start with an encouraging trickle coming out of the line, but end with no real improvement. Throughout the month of June, we were not able to clear the clogged supply line at all. I began to doubt we would ever open it up again.
Well: Well
As the weeks passed and June continued to dry out, the need for water on site only increased. We knew that eventually we would have to resurrect the well anyway, so now seemed as good a time as any to see if our old well still worked.
The initial tests went “well” enough. Despite the fire damage, the pump still worked and we got a normal flow of water from it. This was good news! We might have water after all.
But it is not practical, and in fact risky to deliver water from the well pump directly to a garden hose. Water is incompressible. Restrict the the flow of water enough (by perhaps closing a hose nozzle, or even just kinking the hose while the pump is running) and you are likely to damage the well pump — located all the way down in the bottom of the well. Replacing a pump down there is not an easy (or inexpensive) thing to do!
Well pumps normally avoid this risk by filling a tank, which you then draw from as needed. So what we required was a storage tank between the well pump and the user.
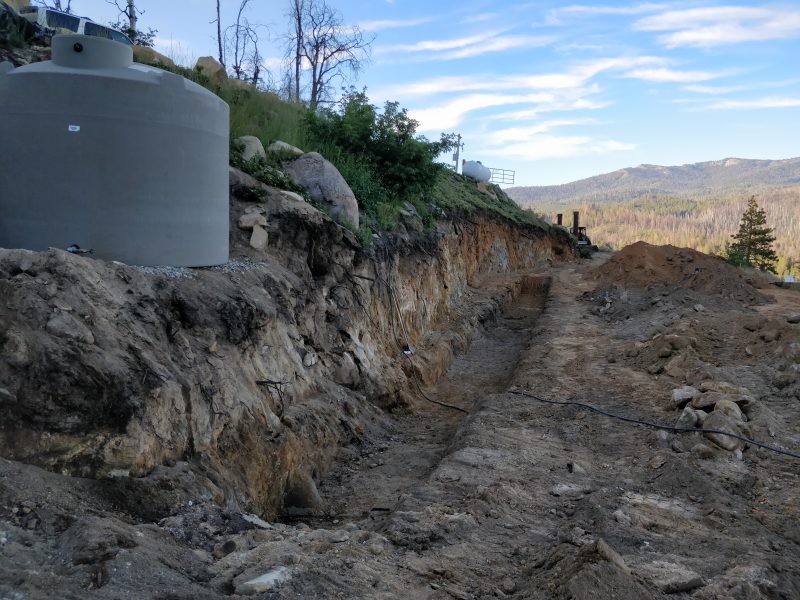
We had already planned to add a storage tank for the spring water system, to store water for irrigation use. So we ordered one from the well contractor, who delivered it and also filled it with water from our well. Yay!

Now at least we had 2500 gallons of (low pressure, gravity-fed) water on site to use for compaction and dust control. This satisfied our immediate needs for water on site.
Well: Not Well
Even though the 10 year old well pump still worked, and our new tank was now full, the well contractor did have his concerns. Electrical measurements showed the pump was not likely to last long. He recommended we pull it up to at least inspect it. Of course once you have gone to the trouble to pull it out, it’s best to replace it — which is what we did.
But what happened next was even more concerning. During extraction, half way up the pump jammed in the well. Only with some luck were the workers able to free it again.
Then they had trouble installing a new 4 inch diameter liner. It also jammed, this time on the way down, only to free itself when they weren’t expecting — and then fall most all the way down the nearly 800 ft deep bore hole!
With some more good luck they managed to extract that new liner, which also brought up more pieces of old liner. Some were melted. The story slowly came into focus, aided by an inspection camera we sent down the well, just so that we could know all we could know about the true condition of the well.
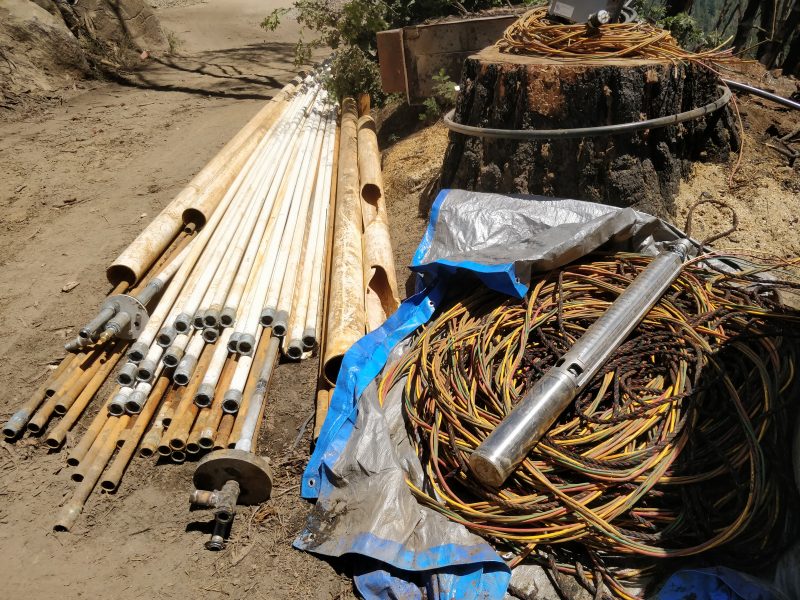
During the fire, the steel well head above ground got hot enough so that the metal fasteners inside melted the plastic liner, which then let go and fell several hundred feet down into the water, eventually coming to rest on the well pump 600 ft below. The impact shattered the liner, and shards of it are what jammed the old pump when they tried to extract it. Likely it was also liner shards that temporarily jammed installation of the new liner, before it too fell into the well.
For awhile it seemed there was more stuff going into the well than coming out of it.
Finally they got the new liner extracted and then reinstalled (securely this time) in its position at the top of the well. Time now to lower the new pump into place 600 feet below the surface.
But it too hung up at about 480 ft. Try as they would, they could not get it to descend any lower.
We had only two options at this point. If we wanted the pump placed any lower, we would have to bring in a drill rig and essentially ream out the bore hole, grinding up any plastic the bit encountered.
But these drills are designed to cut through rock, not plastic. There was some risk that the plastic might gum up the bit and jam it way down deep inside the hole, which would be a real mess. Plus, just getting a drill rig to the well head, and stabilized, on a steep mountainside, would not be an easy task. About the only thing that was certain was that the price tag for this would be both large and unpredictable.
The other option was to leave the pump at the 480 foot level and call it good enough. They ran flow rate tests which confirmed that there was ample water flow at this depth (today anyway).
Who knows what the future might bring? If the water table ever drops low enough, the pump might run dry at 480 feet. If that does ever happen, then we’ll have no choice but to ream out the bore hole.
We decided to call 480 feet good enough. We’ll deal with a dry well later, when and if it occurs.
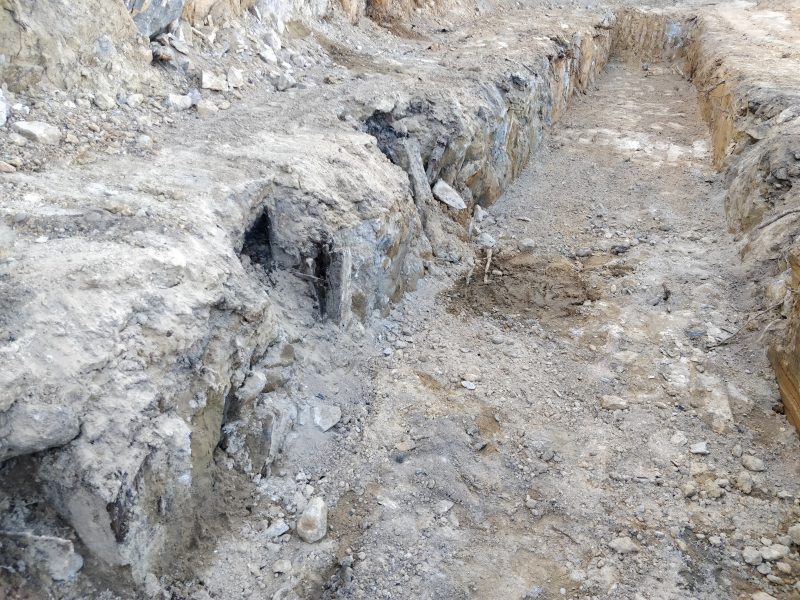
Let the Trenching Begin!
As June came to a close, with our access roads now completed, rock retaining wall in place, and well water available, we could start actually building! Or at least we could start digging the foundation trenches.
The Logjam Breaks!
Just prior to the end of the month — June 27 to be exact — the Forest Service issued its permit for us to repair the fire road — after more than two months of bureaucratic delay.
Finally, we had permission to fix their damn road!
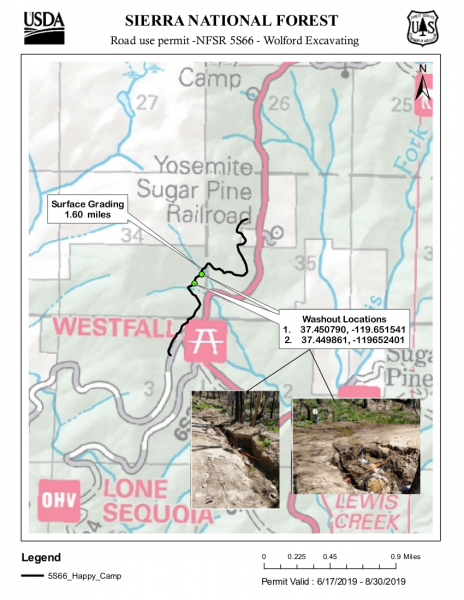
If you care to see the full permit in all its bureaucratic glory, click on the link below.